DieHard Battery Charger Instructions: A Comprehensive Guide
DieHard battery chargers offer reliable solutions for maintaining and restoring vehicle batteries, encompassing 6V and 12V systems, with models like 2871221 and 28.71219.
Understanding Your DieHard Charger Model
DieHard battery chargers are designed for a variety of battery types and vehicle needs. Recognizing your specific model is crucial for optimal performance and safety. The DieHard model number, such as 2871221 (a 12V manual charger) or 28.71219, identifies its capabilities.
These chargers efficiently handle 6-volt and 12-volt lead-acid batteries, including advanced types like AGM, gel, and deep-cycle batteries. Utilizing the “Garage” feature, inputting your vehicle’s year, make, model, and engine ensures compatibility and recommends the correct charger for your specific automotive needs. DieHard consistently receives positive customer feedback for producing high-quality battery charging products. Understanding these details allows for informed usage and maximizes the lifespan of both your charger and your battery.
Identifying the Model Number (2871221 & 28.71219)
Locating your DieHard charger’s model number is the first step towards accessing specific instructions and support. This crucial identifier, found directly on the device or within its manual, unlocks tailored information for your unit. Two common models are the 2871221 and the 28.71219.
The 2871221 is a 12V manual battery charger, offering direct control over the charging process. Conversely, the 28.71219 is designed for efficient charging and maintenance of various automotive batteries. Knowing your model allows you to download the correct user manual – DieHard provides over 21 manuals for 18 models online. Accessing these resources, and understanding your specific model, ensures safe and effective battery charging practices.
DieHard Charger Compatibility: 6V and 12V Batteries
DieHard battery chargers demonstrate versatile compatibility, effectively servicing both 6-volt and 12-volt battery systems commonly found in automobiles, motorcycles, and other vehicles. This broad voltage range ensures a single charger can address the needs of diverse applications, simplifying battery maintenance.
The 28.71219 model, in particular, is explicitly designed to work with both voltage types. Correct voltage selection is paramount for optimal charging and preventing damage to the battery. Always verify your battery’s voltage before connecting the charger. Utilizing the incorrect voltage can lead to undercharging, overcharging, or even permanent battery failure. DieHard chargers aim to provide reliable power solutions for a wide spectrum of battery needs.
Supported Battery Types: Lead-Acid, AGM, Gel, and Deep-Cycle
DieHard battery chargers are engineered to accommodate a comprehensive range of battery types, including traditional lead-acid, Absorbent Glass Mat (AGM), gel, and deep-cycle batteries. This versatility makes them suitable for various applications, from starting car engines to powering marine equipment and recreational vehicles.
AGM and gel batteries, often found in motorcycles and UPS systems, require specific charging profiles. Deep-cycle batteries, commonly used in boats and RVs, demand a different approach to maximize their lifespan. DieHard chargers, particularly those with intelligent charging technology, automatically adjust the charging process based on the detected battery type, ensuring optimal performance and longevity. Always confirm your battery type before initiating a charge cycle for best results.

Setting Up Your DieHard Battery Charger
Proper setup involves connecting the charger to a power source and securely attaching the clamps – positive to positive, negative to negative – for effective charging.
Connecting the Charger to a Power Source
Before connecting your DieHard battery charger, ensure the power source is readily accessible and meets the charger’s voltage requirements – typically standard 120V AC household outlets. Carefully inspect the power cord for any damage, such as cuts or exposed wires, and do not use the charger if the cord is compromised.
Plug the charger’s power cord firmly into the outlet. Avoid using extension cords whenever possible; if one is necessary, ensure it’s heavy-duty and rated to handle the charger’s amperage. Confirm a secure connection to prevent interruptions during the charging process. Always prioritize safety when dealing with electrical connections, and never operate the charger in wet or damp conditions. A stable power supply is crucial for optimal charging performance and battery longevity.
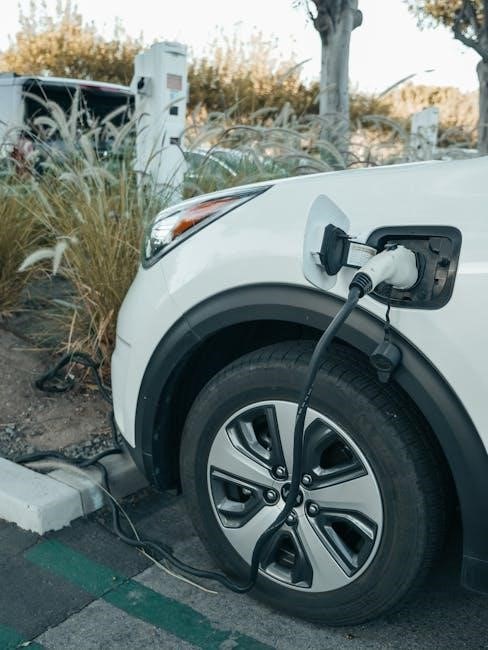
Attaching the Clamps to the Battery Terminals (Positive & Negative)
Prior to attaching the clamps, verify the battery’s voltage – 6V or 12V – to ensure compatibility with your DieHard charger. Identify the positive (+) and negative (-) terminals on the battery; they are usually marked clearly. Connect the red clamp to the positive terminal first, ensuring a firm and secure grip.
Next, connect the black clamp to the negative terminal. Avoid allowing the clamps to touch each other or any metal parts of the vehicle. Double-check the connections to prevent sparks or short circuits. Ensure the clamps are making good contact with the battery posts for efficient charging. Incorrect polarity can damage the battery and the charger, so always confirm the correct connections before initiating the charging process.

Vehicle Compatibility: Using the Garage Feature
DieHard chargers offer a convenient “Garage” feature designed to simplify battery charger selection for your specific vehicle; To utilize this feature, input your vehicle’s year, make, and model, along with the engine type, into the designated section. The system then identifies compatible DieHard battery chargers tailored to your vehicle’s electrical requirements.
This ensures you select a charger that delivers the appropriate voltage and amperage for optimal battery charging and maintenance. Customers consistently praise DieHard for providing high-quality battery charger products. Leveraging the Garage feature minimizes the risk of incompatibility and maximizes charging efficiency. It’s a valuable tool for both novice and experienced users, guaranteeing a proper fit for your automotive needs and extending battery lifespan.

Charging Modes and Functions
DieHard chargers feature both manual and automatic charging modes, alongside jump-starting capabilities in models like the 71323, utilizing intelligent charge technology.
Manual Charging Mode: Detailed Instructions
DieHard’s manual charging mode provides users with direct control over the charging process. First, ensure the charger is connected to a functioning power source and the clamps are securely attached to the battery terminals – red to positive (+), black to negative (-).
Select the appropriate voltage (6V or 12V) based on your battery’s specifications. Monitor the charging process closely, as manual mode doesn’t automatically stop when fully charged.
Observe the ammeter reading; a higher reading indicates a faster charge rate, but avoid exceeding the battery’s recommended charge rate. Regularly check the battery’s voltage using a voltmeter to prevent overcharging, which can damage the battery. Disconnect the charger once the battery reaches its full charge voltage. Always prioritize safety and refer to the complete user manual for detailed guidance specific to your DieHard model.
Automatic Charging Mode: Intelligent Charge Technology
DieHard’s automatic charging mode leverages intelligent charge technology, offering a convenient and safe charging experience. Once connected to a power source and the battery (red to positive, black to negative), the charger automatically detects the battery’s voltage (6V or 12V) and selects the optimal charging profile.

This microprocessor-controlled, multi-stage charging process adjusts the charge rate based on the battery’s needs, transitioning from a fast charge to a float charge for maintenance. The charger intelligently prevents overcharging, extending battery life and ensuring safety.
Users can simply connect the charger and let it manage the process; no manual intervention is required. This feature is particularly beneficial for maintaining batteries during periods of inactivity. Refer to your specific model’s manual for details on indicator lights and any customizable settings within the automatic mode.
Jump Starting with the DieHard 71323 Model
The DieHard 71323 12V 2-6A Shelf Smart Battery Charger Engine Starter offers a jump-starting capability for vehicles with discharged batteries. Before proceeding, ensure the vehicle’s ignition is off and the parking brake is engaged. Connect the red clamp to the positive (+) terminal of the battery and the black clamp to a grounded metal surface away from the battery.
Turn the DieHard 71323 to the “Jump Start” setting. Attempt to start the vehicle. If it doesn’t start immediately, wait a few minutes and try again, avoiding prolonged cranking. Once the vehicle starts, disconnect the clamps in reverse order – black first, then red.
Always consult the vehicle’s owner’s manual for specific jump-starting instructions. Improper jump-starting can damage the vehicle’s electrical system. Prioritize safety and refer to the DieHard 71323 manual for detailed guidance and precautions.
Safety Precautions
DieHard battery chargers require adequate ventilation during use, avoiding sparks, short circuits, and careful handling of cables and clamps for safe operation.
Ventilation Requirements During Charging
DieHard battery chargers, while designed with safety in mind, produce explosive hydrogen gas as a byproduct of the charging process. Therefore, ensuring proper ventilation is absolutely critical when operating these devices. Always charge batteries in a well-ventilated area, ideally outdoors, or in a garage with open doors and windows.
Avoid charging in enclosed spaces like a sealed trunk or a poorly ventilated basement. A sufficient airflow disperses the hydrogen gas, preventing its accumulation to dangerous levels. Never smoke or introduce open flames near a charging battery, as hydrogen is highly flammable. Regularly inspect the charging area for any obstructions that might impede ventilation. Prioritizing ventilation safeguards against potential hazards and ensures a safe charging experience with your DieHard charger.
Avoiding Sparks and Short Circuits
DieHard battery chargers demand strict adherence to safety protocols to prevent sparks and short circuits, which can damage the charger, the battery, and potentially cause injury. Always connect the charger clamps to the battery terminals in the correct order: positive (+) first, then negative (-). This minimizes the risk of accidental arcing.
Ensure the clamps are securely attached and do not come into contact with each other or any metallic surfaces; Inspect the charger cables for any damage, such as frayed wires or cracked insulation, before each use. Never attempt to charge a frozen battery, as it may rupture. Disconnect the charger from the power source before removing the clamps from the battery. Following these precautions will significantly reduce the likelihood of dangerous sparks or short circuits during battery charging.
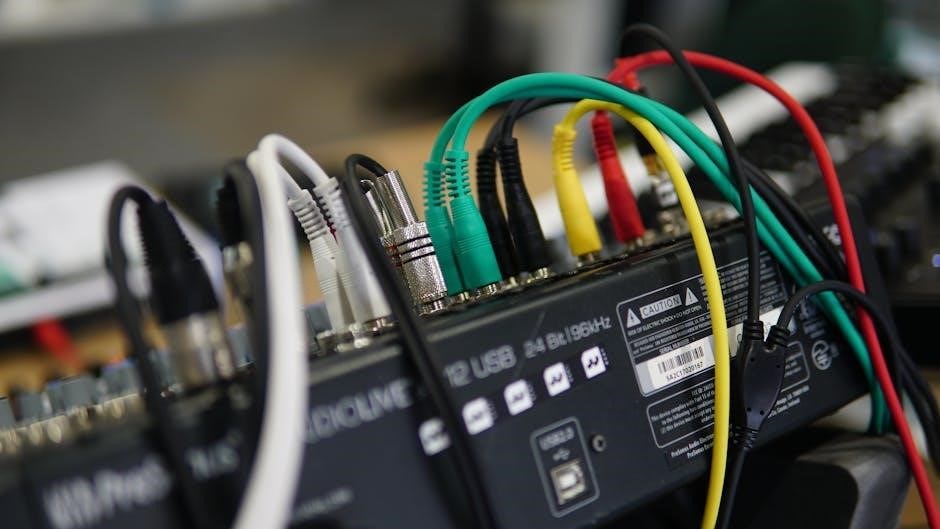
Proper Cable and Clamp Handling
DieHard battery charger cables and clamps require careful handling to ensure safe and efficient operation. Always inspect the cables for damage – cracks, fraying, or exposed wires – before each use, replacing any compromised cables immediately. When connecting clamps, firmly grip the insulated handles, avoiding contact with metal parts.
Ensure a secure connection to the battery terminals, cleaning corroded terminals with a wire brush if necessary. Avoid pulling on the cables to disconnect the clamps; instead, twist and pull from the clamp itself. After use, neatly coil the cables and store them in a dry location, away from extreme temperatures and potential damage. Proper cable and clamp maintenance extends the life of your DieHard charger and minimizes safety risks.

Troubleshooting Common Issues
DieHard battery charger problems like failing to power on, or a battery not charging, can often be resolved by checking connections and error codes.
Charger Not Turning On
If your DieHard battery charger fails to power on, several factors could be at play. First, verify the power source is functioning correctly by testing it with another device. Ensure the charger’s power cord is securely plugged into both the wall outlet and the charger itself.
Next, inspect the charger’s fuse, if applicable, and replace it if blown. A tripped circuit breaker on the electrical panel could also be the culprit; reset it if necessary. Double-check the battery connections – even a loose connection can prevent the charger from initiating.
Consider if the charger has an on/off switch; ensure it’s in the ‘on’ position. If the issue persists, consult the DieHard battery charger manual for model-specific troubleshooting steps or contact DieHard customer support for assistance.
Battery Not Charging
If your DieHard charger connects but the battery isn’t charging, begin by confirming correct polarity – red clamp to positive (+), black to negative (-). Incorrect connections can prevent charging and potentially damage the battery or charger. Ensure the battery terminals are clean and free of corrosion, as this hinders a good electrical connection.
Verify the battery’s voltage; a severely discharged battery might not register on the charger initially. Try a different charging mode (manual or automatic) to see if one functions. Check the charger’s display for any error codes, referencing the manual for their meaning.
Consider the battery type – DieHard chargers support lead-acid, AGM, gel, and deep-cycle batteries; selecting the wrong setting can impede charging. If problems continue, consult the DieHard manual or contact customer support for further guidance.
Error Codes and Their Meanings
DieHard battery chargers utilize error codes to diagnose issues, displayed on the unit’s screen. While specific codes vary by model (like 71323, 2871221, and 28.71219), common indicators signal problems. A “Low Voltage” error suggests insufficient battery voltage for charging to commence, requiring a pre-charge or battery replacement.
“Reverse Polarity” indicates incorrect clamp connections – immediately disconnect and reattach, ensuring red to positive (+) and black to negative (-). “Overcharge” signals the battery is fully charged and the charger has ceased delivering current. A “Short Circuit” error points to a potential fault in the battery or charger circuitry; discontinue use.
Consult your DieHard charger’s manual for a comprehensive list of error codes and their corresponding solutions. DieHard’s customer support can also assist in interpreting codes and troubleshooting issues. Ignoring error codes can lead to battery damage or charger malfunction.
Resources and Support
DieHard provides downloadable manuals and user guides for 18 models, including the 2871221 and 28.71219, alongside dedicated customer support channels.
Downloading DieHard Battery Charger Manuals
DieHard offers a comprehensive online resource for accessing user manuals for its range of battery chargers. Currently, the database contains 21 user manuals covering 18 distinct DieHard battery charger models. This readily available collection ensures that owners can easily find the specific documentation needed for their particular charger, such as the 2871221 or the 28.71219.
These manuals are available in PDF format, allowing for convenient download or online viewing. Users can navigate the list of products to locate the appropriate manual for their device. The availability of these resources empowers users to understand the full functionality of their charger, troubleshoot potential issues, and ensure safe and effective operation. Accessing these manuals is a crucial step in maximizing the lifespan and performance of your DieHard battery charger.
Finding User Guides for Different Models
DieHard simplifies locating user guides for its diverse battery charger lineup. A dedicated section on their support website hosts downloadable manuals and service guides for 44 devices within the Battery Charger category. This centralized hub allows users to quickly pinpoint the correct documentation for their specific model, whether it’s a manual charger like the 2871221 or a more advanced unit like the 71323.
The process involves selecting from a listed appliance catalog to reveal all available service manuals. This ensures compatibility and provides detailed instructions tailored to each charger’s features and functions. Having access to these guides is essential for understanding charging modes, safety precautions, and troubleshooting common issues, ultimately maximizing the charger’s performance and extending battery life.
DieHard Customer Support Contact Information
DieHard provides multiple avenues for customers needing assistance with their battery chargers. While specific direct contact details like phone numbers aren’t prominently displayed, support is primarily accessed through their online resources and the Advance Auto Parts network, as DieHard products are largely sold through them.
Customers can initiate support requests via the Advance Auto Parts website, utilizing their online chat feature or submitting inquiries through a contact form. This allows for detailed descriptions of issues and potential troubleshooting steps. Furthermore, accessing the comprehensive library of downloadable manuals and user guides – covering 21 products across 18 models – often resolves common questions independently. For in-depth assistance, visiting a local Advance Auto Parts store is recommended, where knowledgeable staff can offer personalized guidance.