Step 2 Water Table Instructions: A Comprehensive Guide
Step 2 water table assembly is generally simple, requiring careful adherence to included manuals with illustrations for stability and safety.
Detailed step-by-step guidance ensures a fun and secure play experience for your little ones during warm weather activities.
Understanding Your Step 2 Water Table Model
Step 2 water tables are designed to provide hours of engaging, sensory play for young children, fostering creativity and social interaction. Before beginning assembly, familiarize yourself with the specific features of your model – whether it’s the Archway Falls or Waterpark Wonders version.
Each model boasts unique elements like tiered designs, spillways, and integrated accessories. Understanding these components beforehand will streamline the assembly process. Refer to the included manual to identify the intended function of each part.
Knowing the layout and play possibilities will also enhance your child’s enjoyment and allow you to supervise effectively. These tables are built for outdoor use, promoting active play and exploration in a safe environment.
Identifying All Included Parts
Carefully unpack your Step 2 water table and cross-reference all components with the parts list in the assembly manual. This crucial step prevents frustration during construction and ensures you haven’t received a damaged or incomplete product.
Typically, you’ll find the table base, legs, tabletop, water reservoirs, spillways, and various smaller accessories. Lay out all pieces on a protected surface to avoid scratches or loss.
Pay close attention to the different screw and connector types, as they are often specific to certain assembly stages. Identifying each part before you begin will significantly speed up the process and guarantee a structurally sound water table.
Pre-Assembly Preparation: Tools & Space
Before commencing assembly, designate a spacious, flat, and protected work area. A garage floor or covered patio is ideal, safeguarding components from scratches and providing ample room to maneuver.
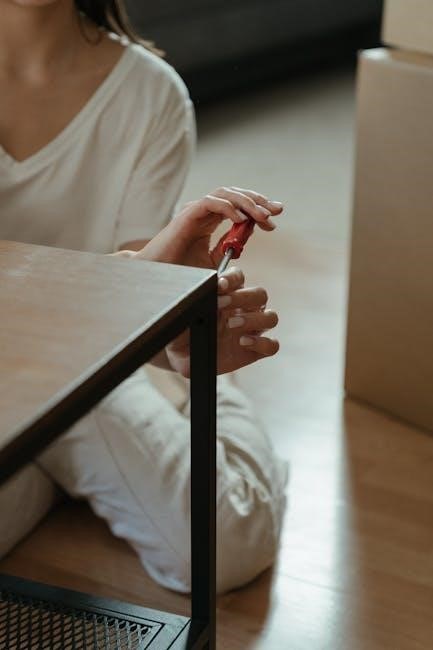
Generally, a Step 2 water table requires minimal tools. A Phillips head screwdriver is usually sufficient, though a power screwdriver with adjustable torque can expedite the process. Avoid over-tightening screws, which could damage the plastic.
Having a soft cloth handy is beneficial for wiping away any dirt or debris. Finally, keep the assembly manual readily accessible throughout the entire process for easy reference.

Assembly Process ⎯ Base & Legs
Step 2 water table base and leg attachment is the initial build phase, ensuring a stable foundation for hours of splashing fun and playtime.
Attaching the Legs to the Base
Attaching the legs to the Step 2 water table base typically involves aligning the leg components with the designated slots or mounting points on the underside of the base.
Secure each leg using the provided screws or fasteners, ensuring they are properly inserted and tightened. It’s crucial to avoid over-tightening, which could potentially damage the plastic components.
Refer to the assembly manual for specific guidance on the correct leg orientation and fastening sequence. Some models may feature snap-lock mechanisms for easier attachment. Double-check that all legs are firmly connected before proceeding to the next assembly stage, guaranteeing a stable and safe play structure for children.
Ensuring Leg Stability & Tightening
Once the legs are initially attached, thoroughly assess the stability of the Step 2 water table base. Gently apply pressure to each leg, checking for any wobble or looseness.
If instability is detected, re-tighten the screws or fasteners, ensuring a snug fit. Avoid excessive force, as this could strip the threads or crack the plastic.
Periodically inspect the leg attachments, especially after initial use, to confirm they remain secure. A stable base is paramount for child safety during water play. Consistent monitoring and tightening, when needed, will prolong the life and safety of your water table.
Assembling the Water Table Top
Carefully connect the water table top to the assembled base structure, aligning all designated connection points for a secure fit.
Ensure a level surface for optimal water distribution and a safe, enjoyable play experience for children.
Connecting the Top to the Base Structure
Connecting the water table top requires precise alignment with the base. Typically, this involves snapping the top onto the legs and base frame, ensuring each connection point clicks securely into place. Refer to your model’s specific manual for detailed diagrams illustrating the correct orientation and attachment method.
Apply gentle, even pressure when attaching the top to avoid cracking or damaging the plastic components. Double-check that all sides are firmly connected before proceeding. A wobbly top indicates an improper connection, requiring re-alignment and re-attachment. This step is crucial for the overall stability and safety of the water table, preventing accidental tipping during playtime.
Confirm a snug fit to prevent water leakage and maintain a safe play environment.
Checking for Level Surfaces & Adjustments
Ensuring a level surface is paramount for water table stability and safe play. Place the assembled table on the intended outdoor surface and observe for any wobbling. Uneven ground can cause instability, potentially leading to spills or tipping.
Many Step 2 models feature adjustable leg components. If wobbling occurs, rotate or extend these legs until the table sits firmly and evenly on the ground. Utilize a level tool for precise adjustments, confirming a perfectly horizontal surface.
Proper leveling prevents water from pooling unevenly and minimizes the risk of accidents. Regularly re-check the level, especially after moving the table, to maintain a secure and enjoyable play experience for children.

Installing Water Features & Accessories
Add water reservoirs and spillways according to the manual, then attach additional toys for enhanced play.
These components create interactive fun, maximizing the enjoyment of your Step 2 water table.
Adding Water Reservoirs & Spillways
Carefully position the water reservoirs within the designated areas of your Step 2 water table, ensuring a snug and secure fit. These reservoirs are designed to hold the water, creating pools for splashing and play.
Next, attach the spillways, typically by snapping them into place or using provided connectors. Spillways control the water flow, adding an element of cause and effect as children pour water and observe it cascading down.
Double-check all connections to prevent leaks and ensure proper functionality. The correct installation of reservoirs and spillways is crucial for a safe and enjoyable water play experience, allowing for dynamic water movement and interactive fun for toddlers.
Attaching Additional Toys & Components
Enhance your child’s Step 2 water table experience by attaching the included toys and components. These often include small buckets, cups, boats, or spinning features designed to encourage imaginative play and water exploration.
Locate the designated attachment points on the water table and securely fasten each toy. Ensure they are firmly in place to prevent accidental dislodging during play. Some components may snap directly onto the table, while others might require simple twisting motions.
Consider the age and developmental stage of your child when selecting which toys to include, prioritizing safety and engagement. A well-equipped water table fosters creativity and provides hours of entertainment.

Water Table Setup & Initial Fill
Position the assembled Step 2 water table on a level outdoor surface, away from obstructions. Fill with water to the recommended level for safe, splashy fun!
Positioning the Water Table Outdoors
Step 2 water tables are designed for outdoor use, so selecting the right location is crucial for a safe and enjoyable play experience. Choose a level surface, such as a lawn or patio, to ensure stability and prevent tipping. Avoid placing the table on uneven ground or slopes.
Consider proximity to a water source for easy filling and drainage. However, keep the table away from electrical outlets to prevent hazards. A shaded area is ideal to keep the water cooler and protect children from excessive sun exposure. Ensure there’s ample space around the table for children to move freely and play comfortably. Regularly inspect the surrounding area for potential tripping hazards like toys or garden tools.
Finally, remember to position the table within sight of a supervising adult for constant oversight during playtime.
Filling with Water: Recommended Levels
When filling your Step 2 water table, always use a garden hose or bucket to carefully add water. Avoid high-pressure streams that could damage the table or surrounding area. The ideal water level will vary depending on the model and the age of the children playing.
Generally, filling the reservoir to approximately two-thirds full is a good starting point. This provides ample water for splashing and play without creating a significant overflow risk. Never fill the table completely to the brim, as this could lead to spills and potential hazards.
Always supervise children closely during filling and playtime, and adjust the water level as needed to ensure safety and enjoyment.
Safety Precautions & Supervision
Step 2 water tables require constant adult supervision to prevent drowning and ensure safe play. Monitor water depth and child activity closely.
Adult Supervision Requirements
Step 2 explicitly states that constant and vigilant adult supervision is absolutely crucial when children are playing with a water table. Never leave a child unattended near the water table, even for a brief moment. Young children are at risk of drowning in even shallow water depths, making continuous oversight non-negotiable.
The supervising adult should be within arm’s reach of the child(ren) at all times, actively observing their play. This allows for immediate intervention if a child experiences difficulty or engages in unsafe behavior. Avoid distractions, such as cell phones or other tasks, that could divert your attention from the water table. Remember, proactive supervision is the most effective way to prevent accidents and ensure a safe and enjoyable experience for everyone.
Water Depth & Child Safety
Maintaining appropriate water levels is paramount for child safety when using a Step 2 water table. Avoid filling the table to a depth exceeding a few inches, especially with toddlers or very young children. Even shallow water presents a drowning risk, demanding constant adult supervision as previously emphasized.
Regularly assess the water depth throughout playtime, as splashing and movement can cause levels to fluctuate. Teach children not to run around the water table to minimize the risk of slips and falls. Consider using a non-slip mat underneath the table for added stability. Prioritize safety by creating a secure play environment and consistently monitoring water levels.

Maintenance & Cleaning
Step 2 water tables require regular cleaning to prevent mildew and maintain hygiene. Thoroughly rinse and dry after each use, and store properly during colder months.
Regular Cleaning Procedures
Maintaining a clean Step 2 water table is crucial for hygienic play. After each use, completely drain the water and rinse all surfaces with a garden hose to remove any debris or residue. For a deeper clean, utilize a mild soap solution and a soft cloth or sponge; avoid abrasive cleaners that could scratch the plastic.
Pay close attention to corners and crevices where dirt can accumulate. A gentle scrub brush can be helpful for these areas. Once cleaned, thoroughly rinse away all soap residue with clean water. Allow the water table to air dry completely before storing or using it again. This prevents the growth of mold and mildew, ensuring a safe and enjoyable play environment for children. Regular upkeep extends the life of your Step 2 product!
Winter Storage Instructions
Proper winter storage is essential to protect your Step 2 water table from damage during freezing temperatures. Before storing, thoroughly clean and completely dry the water table to prevent mold or mildew growth. Disassemble any components if possible, and store them in a dry, covered location like a garage, shed, or basement.
Avoid storing the water table directly on the ground; use a pallet or wooden boards to elevate it. This prevents moisture buildup and potential damage. Covering the water table with a tarp or protective sheet will further shield it from dust and debris. Inspect the table before next season’s use to ensure all parts are intact and ready for fun!

Troubleshooting Common Issues
Step 2 water tables may experience leaks or unstable legs; address these promptly by checking connections and ensuring proper tightening for safe play.
Addressing Leaks & Drainage Problems
Step 2 water tables, while durable, can sometimes develop leaks. The first step is to thoroughly inspect all connections – where the legs attach to the base, and where the water reservoirs or spillways connect to the tabletop.
Ensure all parts are securely fastened; tightening screws or clips may resolve minor leaks. If a leak persists, carefully examine the plastic itself for cracks or punctures. Small cracks can sometimes be temporarily sealed with waterproof tape, but significant damage may require part replacement;
Regarding drainage, ensure the drain plug (if equipped) is properly inserted and sealed. Check for any obstructions in the drainage opening that might be hindering water flow. A clear drainage system prevents water buildup and ensures easy cleanup after playtime.
Fixing Unstable Legs
An unstable Step 2 water table poses a safety hazard, so addressing wobbly legs is crucial. Begin by ensuring all leg attachments are correctly aligned and fully inserted into the base. Tighten all screws, bolts, or locking mechanisms associated with the leg connections – this is often the primary solution.
If the legs remain unstable even after tightening, inspect the legs themselves for any cracks or damage. Uneven ground can also contribute to wobbling; position the water table on a level surface.
Consider using furniture levelers under the legs if the ground is consistently uneven. For persistent instability, contacting Step 2 customer support for replacement legs might be necessary.

Step 2 Water Table Model Variations
Step 2 offers diverse water table models like Archway Falls and Waterpark Wonders, each with unique assembly nuances and features for enhanced play.
Archway Falls Water Table Assembly
The Step2 Archway Falls Water Table is celebrated for its easy setup, making it a fantastic choice for summer fun with children aged 1.5 years and older. Assembly typically begins with attaching the legs to the base, ensuring a secure fit for stability.
Next, the tabletop is connected to the base structure, requiring careful alignment to guarantee a level playing surface. Pay close attention to the included instructions, as they provide visual aids to simplify the process. Once assembled, the archway and waterfall features can be installed, adding to the interactive play experience.
Remember to double-check all connections and tighten screws as needed to prevent wobbling or potential hazards. This model’s open design allows multiple toddlers to enjoy simultaneous play, fostering social interaction and imaginative fun.
Waterpark Wonders Two-Tier Water Table Setup
Setting up the Step2 Waterpark Wonders Two-Tier Water Table involves a few key steps to ensure a safe and enjoyable play experience. Begin by carefully unpacking all components and referencing the included manual – model numbers 4145 or 414599.
The base assembly is crucial; attach the legs securely, verifying stability before proceeding. Next, connect the two tiers, ensuring proper alignment for optimal water flow between levels. The open 360-degree design accommodates multiple children, promoting collaborative play.
Once assembled, familiarize yourself with the various water features, like the flippers and spinning features, before introducing water. Regularly consult the manual for maintenance and cleaning guidelines to prolong the table’s lifespan.

Finding Replacement Parts
Step2 offers customer support and readily available replacement parts online and through retailers, ensuring your water table remains functional and fun!
Step 2 Customer Support Contact Information
Step2 provides multiple avenues for customer support to assist with any questions or concerns regarding your water table. For immediate assistance, you can reach their dedicated customer service team via phone. Their toll-free number is readily available on the Step2 website, allowing for direct communication with a knowledgeable representative.
Alternatively, Step2 offers comprehensive support through their official website. The website features a detailed FAQ section addressing common inquiries, troubleshooting tips, and assembly guidance. You can also submit inquiries through an online contact form, receiving a personalized response from their support team within a reasonable timeframe.
Furthermore, Step2 maintains an active presence on social media platforms, providing another channel for customer interaction and support.
Locating Parts Online & Through Retailers
Finding replacement parts for your Step2 water table is convenient through several channels. The official Step2 website hosts a dedicated parts store, allowing you to directly purchase needed components. Searching by model number ensures accurate part selection, streamlining the process.
Additionally, numerous online retailers, such as Amazon and Walmart, carry a wide range of Step2 replacement parts. These platforms often offer competitive pricing and convenient shipping options. Local retailers that originally sold Step2 products may also stock common replacement parts.
If unsure about the specific part required, contacting Step2 customer support can provide guidance and assistance in identifying the correct component.